Phone pouch tut
Hey guys,
So I was looking at my phone today and I noticed it's got some really tiny chips in the plastic right at the top. Needless to say I was not impressed.
I had a silicone cover for it but it was really big and bulky and it made it almost impossible to get my phone in or out of my pocket. And because iPhones are the most popular smartphone in NZ, there are pretty much no accessories for my poor little HTC (they sell the phones here but no cool stuff for them.. why Vodafone, why?). So anyway, my phone's looking a bit sad and it needed some cheering up so I made it a purrdy little phone snuggler! Better late than never I spose, hehe. I did a tut for it (you could adjust the measurements to fit any kind of device tho), enjoy!
What you will need:
piece of fabric for lining (for width/length see Step1)
piece of fabric for outside of pouch
piece of padding
12cm piece of ribbon
1 x button
a needle and thread
Step 1: Measure your phone.
The width of my phone (including the sides) was 8cm and I added 2cm allowances so my final width was 10cm. The length of my phone was 14cm. I doubled that (28cm) and added 4cm (because you want the pouch to fold over and slightly overlap) to get a final length of 32cm (this includes seam allowances).
Step 2: Cut out your fabric. My pieces were 10 x 32cm. I cut one piece of lining, one piece for the outside of the pouch and one piece of padding.
Step 3 (optional): Because I only had 2cm wide ribbon, I folded it in half and sewed up close to the edge to give me a thinner piece of ribbon.
Step 4: Bring the two ends of your ribbon together to make a little loop.
Step 5: Match up your padding piece and your lining fabric wrong sides together. Sandwich your ribbon loop in between the lining fabric and the outer fabric with the loop inside and the fabric pieces right sides together. Pin in place.
Step 6: Sew all around your sandwich, about 1cm from the edge.
Make sure you leave a gap at the end opposite to the ribbon so you can turn it inside out later. Clip your corners to prevent bulk when you turn inside out (not shown in this photo, sorry).
Step 7: Turn your sandwich inside out and iron flat.
Step 8: Fold the open edges in and iron.
Step 9: Sew folded edge closed.
Step 10: Attach a button. I forgot to do this when I made my pouch, instead I had to fiddle around and try to stitch the button on after I'd completed the pouch. It's much easier to do it now tho! Put your phone or device on your rectangle and fold the bottom up so it's just below the top of your phone (with the top of the phone peeping out). Fold down the top of the pouch (the end with the ribbon) and decide where to put your button. Mark the spot with some chalk. Unfold everything, remove your phone and stitch on the button.
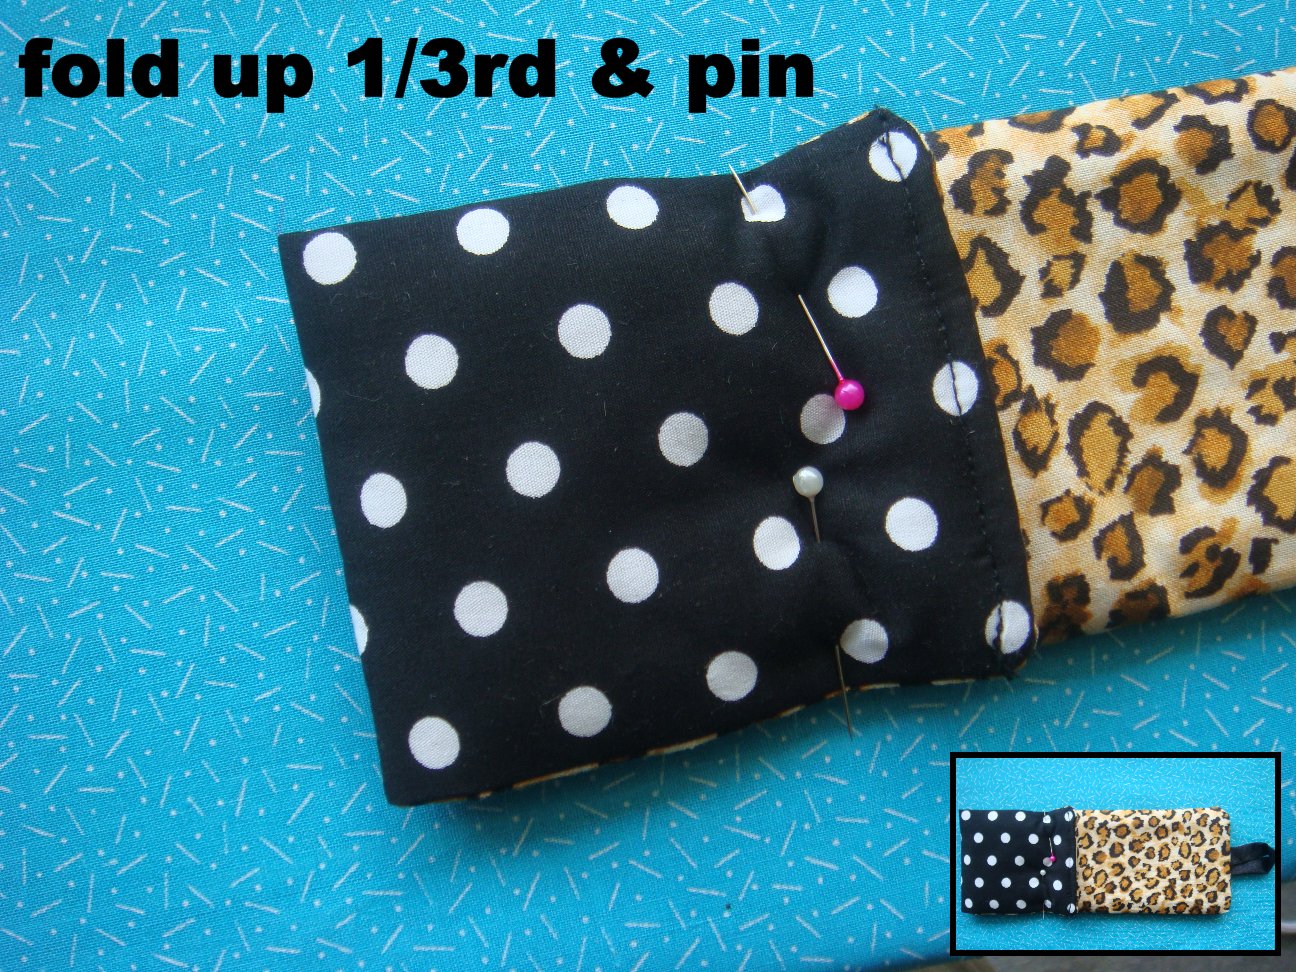
Step 11: Fold up the edge you sewed closed in step 9, about 1/3rd the way up itself, and pin. Sew up both sides, very close to the edge. Don't forget to backstitch to secure your stitching.
You're done! Insert your phone and admire your cute new phone snuggler!
Hope you like it!
San xx


WHEEEEEEEEEEEEEEERE DID YOU GET the leopard print from? I really hope it's not just available in NZ!!!
ReplyDelete